Now that the iOS 26 public beta is available, more people can preview Apple’s latest mobile software ahead of its final release later this fall. I’ve been using the iOS 26 beta ever since it was released shortly after WWDC 2025, and if you’ve already hit that install button for the public beta, you’re in store for a big surprise.
There’s obviously a lot of buzz around the big makeover that Apple’s implementing, but not all the new changes and additions make for a more meaningful experience. That’s why I want to share the settings I think you need to change first soon after installing the iOS 26 public beta.
Of course, Apple could continue to change stuff with subsequent public beta updates. But for now, you’ll get more out of the experience by adjusting these settings.
Reduce transparency with Liquid Glass
As much as Liquid Glass adds depth and separation with its new material design, there are instances when Liquid Glass looks messy. Case in point, when you access Control Center and how the transparency of the interface makes it look too confusing. Just take a look at the shot above!
In order to make Liquid Glass more suitable, I recommend enabling the setting for reduce transparency to make Liquid Glass less transparent — and it’s quite easy. Just got the general Settings menu, select Accessibility, then Display & Text Size, and finally hit the toggle for Reduce Transparency.
Once it’s enabled, you’ll see how Liquid Glass elements around the interface will have more of an opaque appearance instead of being transparent.
Turn on Camera Control adjustments
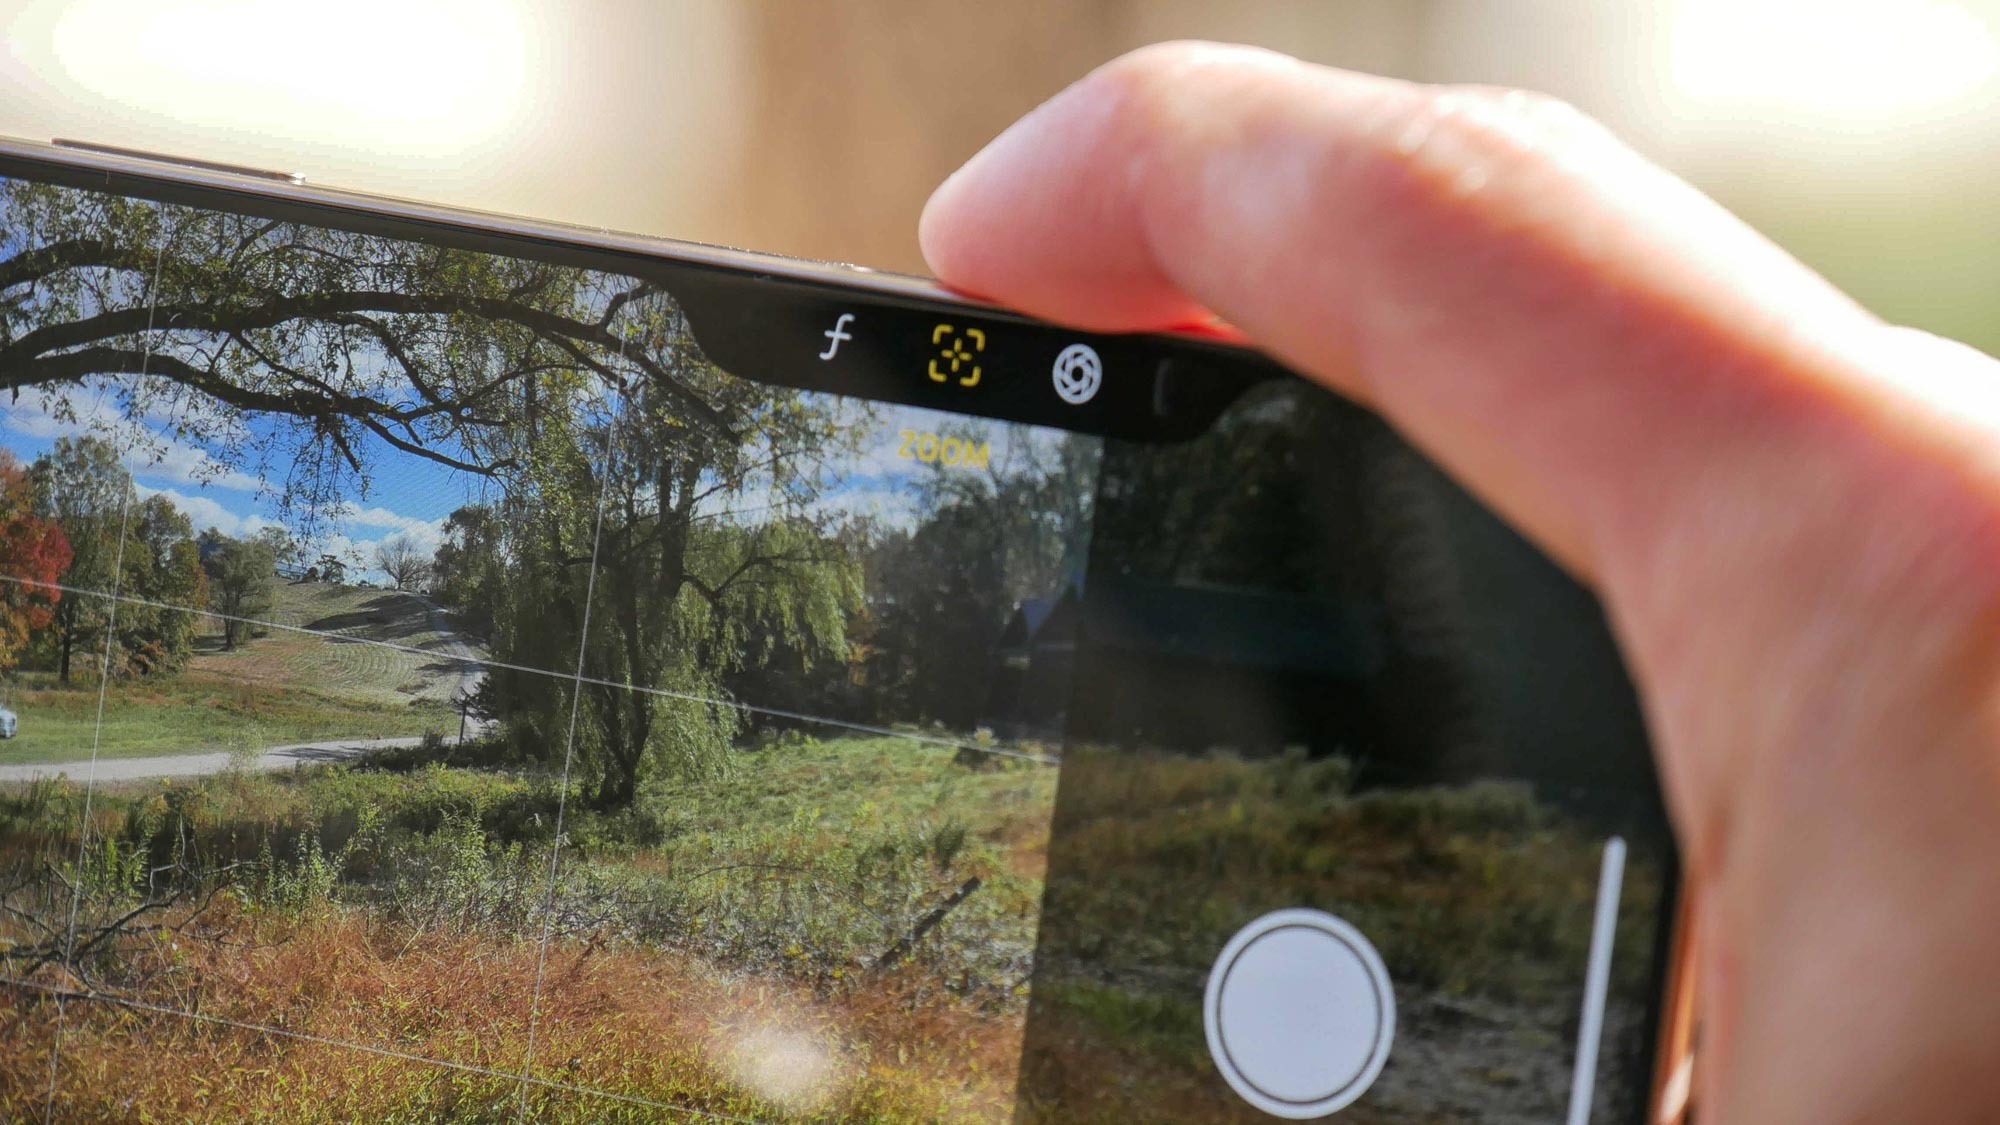
Whether you’re for or against the new Camera Control button on the iPhone 16 series, you might notice after installing the iOS 26 public beta that its behavior has changed.
While pressing on the button launches the camera app, the other Camera Control gestures could be disabled. I’m referring to the two-press gesture used to switch between the various modes. You’ll want to restore it back to its original setting by enabling the setting for Camera Control adjustments.
Simply navigate to general Settings, then proceed to Camera. From here, select Camera Control and enable the toggle for Camera Adjustments under Controls. In addition to reenabling all of the Camera Control adjustments, you can also customize the gestures and the hierarchy of the controls.
Enable Adaptive power mode
Shortly after I installed the iOS 26 developers beta, I noticed my battery life taking a big hit on my iPhone 16 Pro Max. I’m not really surprised by this, seeing that battery saving optimizations are a work in progress with any beta software. However, there’s one setting that will help out with exactly this.
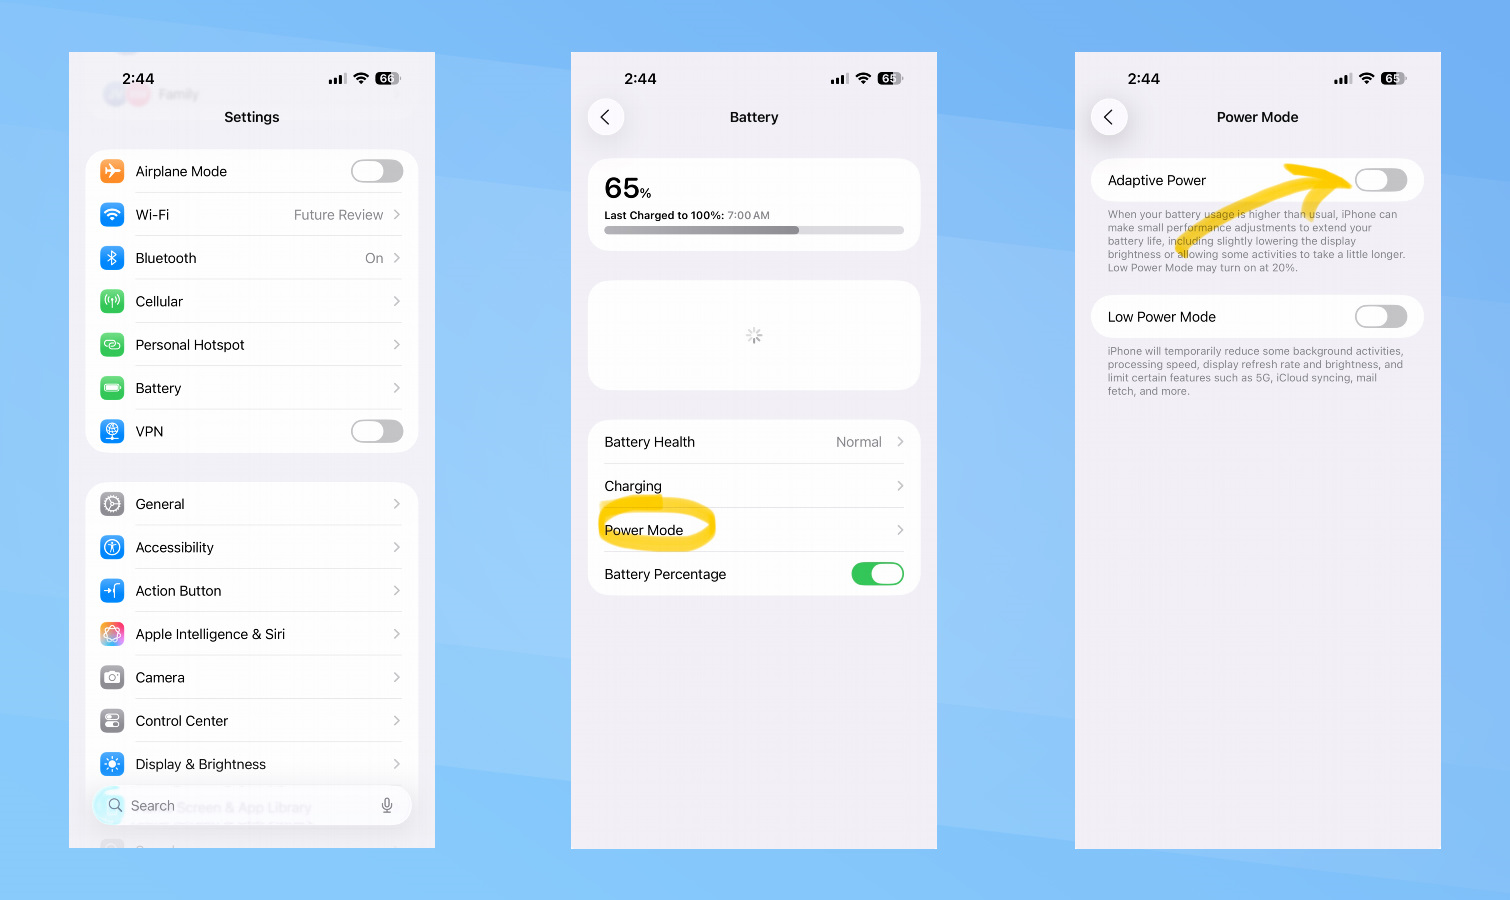
It’s the new “adaptive power” mode in iOS 26 that aims to extend the battery life of your compatible iPhone. There are optimizations with this mode that helps to extend your iPhone’s battery life by doing things such as lowering the screen brightness — or “allowing some activities to take a little longer.”
You can enable adaptive power mode by going into Settings, Battery, and then Power Mode. There’s a toggle for adaptive power that you select to enable it.
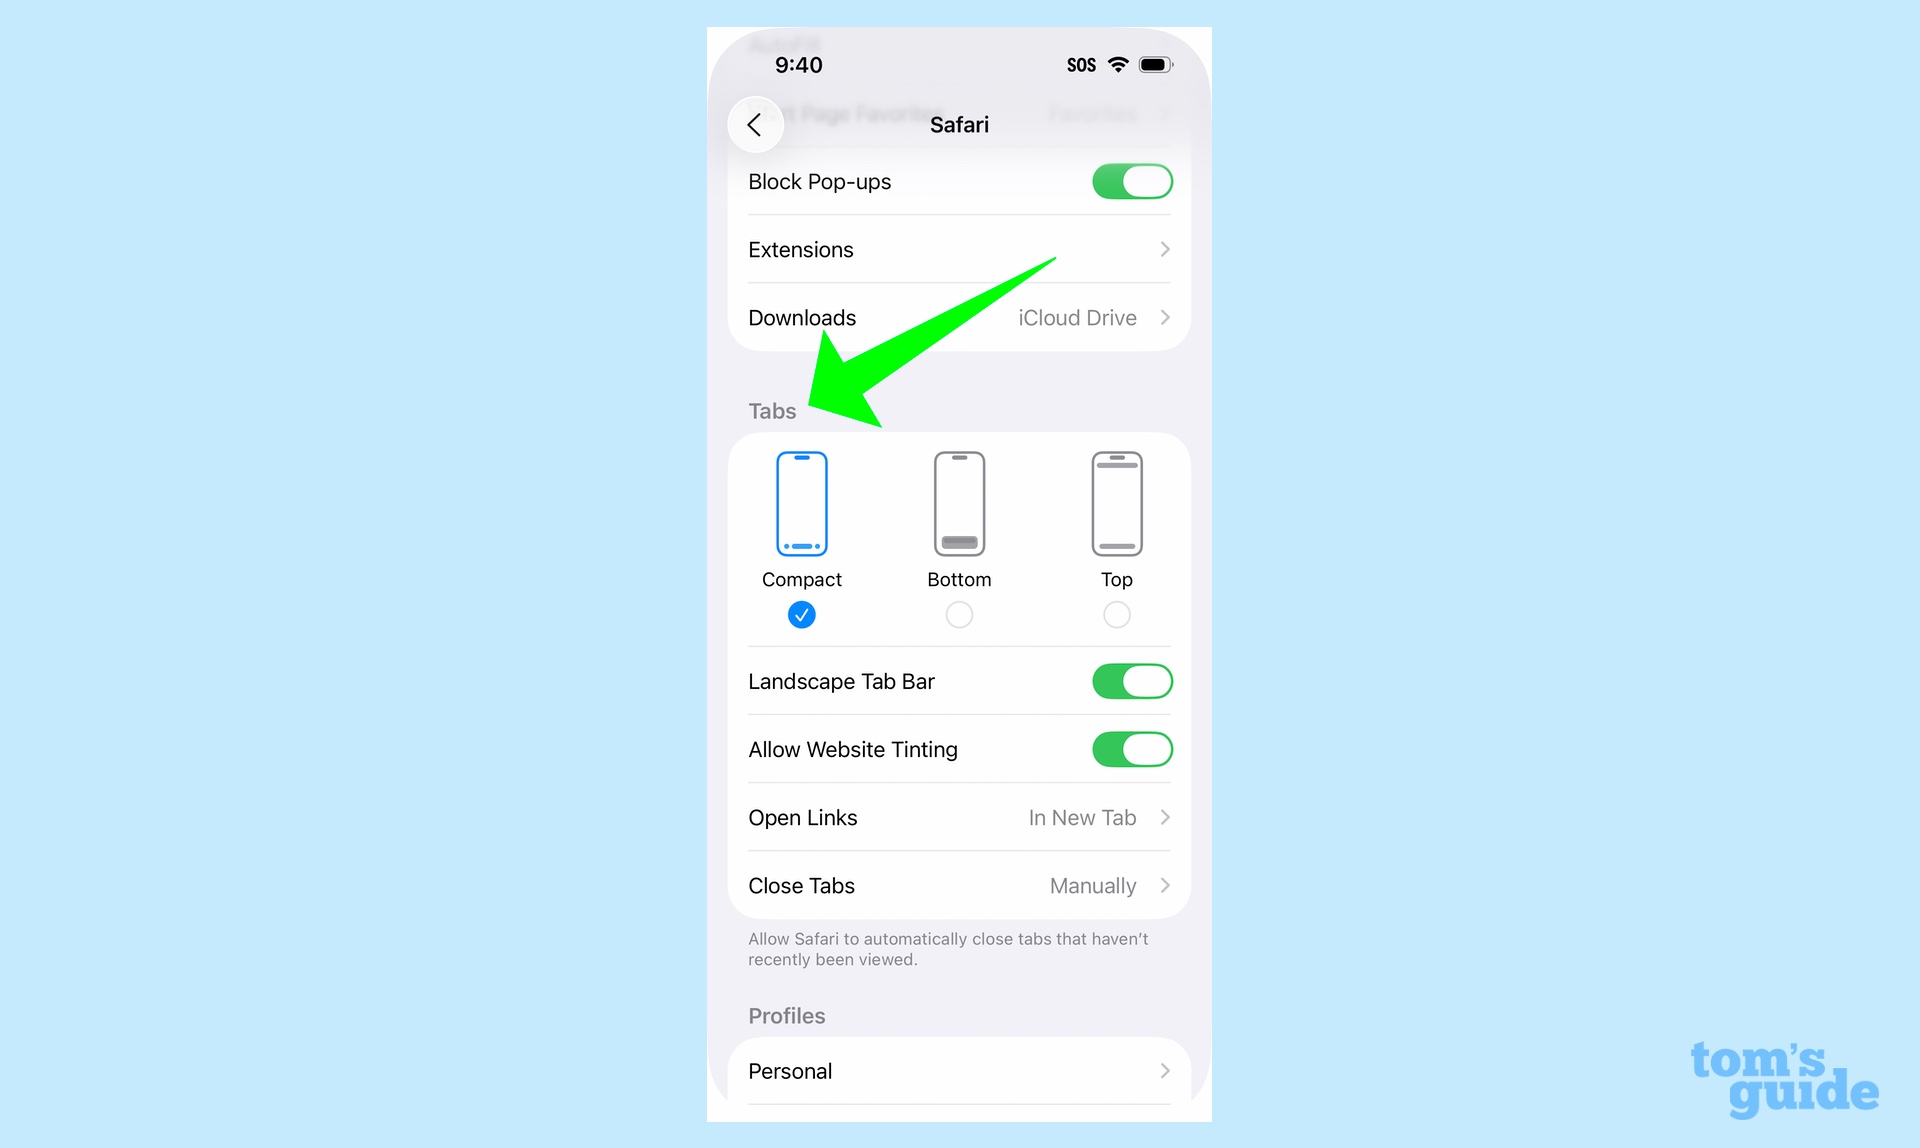
Apple changes the look of Safari with the iOS 26 public beta, namely the toolbar and tabs. The look with the default setting makes the toolbar appear as minimalist as they come, with it almost disappearing when you begin to scroll web sites.
I prefer the Safari toolbar to be a bit more prominent, which is why you’ll want to change the setting to change its layout. You can do this quickly by going into the Settings, then scroll down to Apps. Once there, you’ll have to scroll all the way down until you see Safari (or just type Safari into the search box), and then find the section for ‘tabs’ halfway down the page.
You have three options: compact, bottom, and top. The iOS 26 public beta defaults to compact, but I’d suggest changing it to top if you bottom to make the toolbar a bit bigger so that it’s easier to see.
Show your screenshots in the photo library
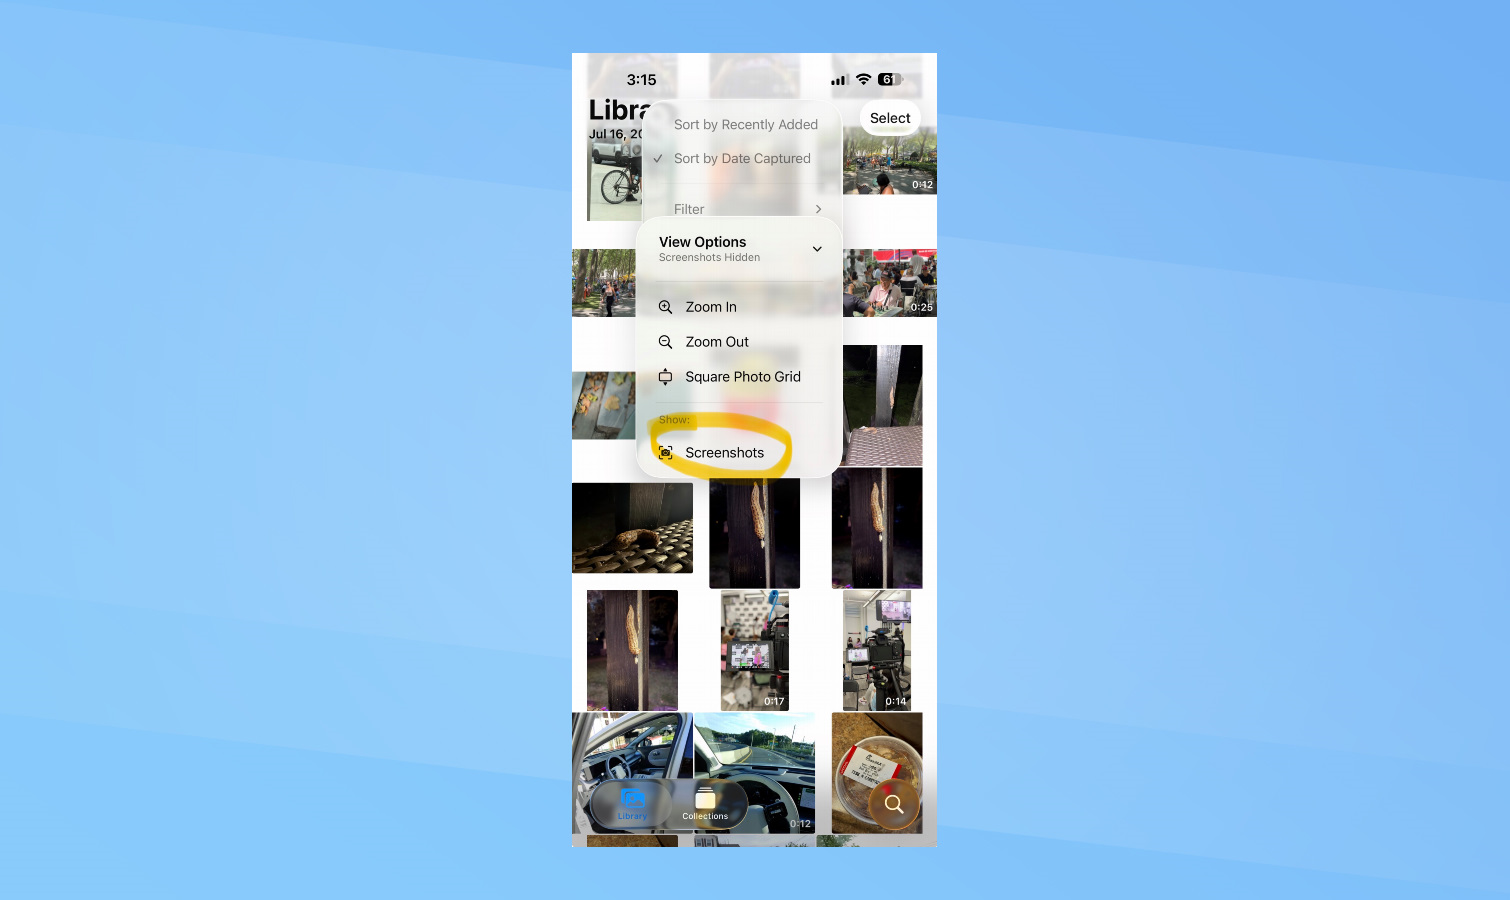
This one may not be as pressing, but I know it’s something that annoys me because when I go into my photo library, I want to see everything — including the screenshots I capture. With iOS 26, the Photos app gets another redesign, but I’ve noticed that screenshots aren’t shown under my photo library.
Instead, they’re populated within the Screenshots folder under the collections tab, but I also want to see them in the main library. You can easily get them to show up by tapping on the filter icon on the top right indicated by the three horizontal lines icon, then tap on View Options, and finally press on screenshots to show there’s a checkmark on it. Now, all of your screenshots will show up under the library in addition to the screenshots folder.
Follow Tom’s Guide on Google News to get our up-to-date news, how-tos, and reviews in your feeds. Make sure to click the Follow button.
