If you want a button that quickly closes all your chosen running apps, you’re in luck. Windows 11 lets you make such a button, and I’ll show you how.
Why Create a Panic Button
There are many reasons you may want to create a panic button. Maybe you work at a co-working space and people occasionally come up to your desk. Having a panic button ensures they don’t see your open apps. Perhaps you’re asked to share your screen, and you don’t want your open apps displayed.
Having the ability to quickly close all your chosen apps at once also helps you get into focus mode, if that’s what you’re looking for.
Close All of Your Programs Using a Batch File
One way to quit all your chosen running apps is by using a batch file. A batch file contains a set of commands that run one after another, achieving the specified tasks.
Related
7 Useful Batch Files You Can Create to Automate Tasks on Windows 11
Including launching multiple apps at once.
To create such a file, open Windows Search (press Windows+S), type Notepad, and launch the app. In a new document, type the following:
@echo off
taskkill /f /im chrome.exe
taskkill /f /im firefox.exe
taskkill /f /im notepad.exe
taskkill /f /im wordpad.exe
taskkill /f /im explorer.exe
timeout /t 2
start explorer.exe
In the script, next to each taskkill command, specify the process name of the apps you want to close. To find an app’s process name, right-click the Windows taskbar and choose “Task Manager.” Access the “Details” tab, and you’ll see each app’s process name.
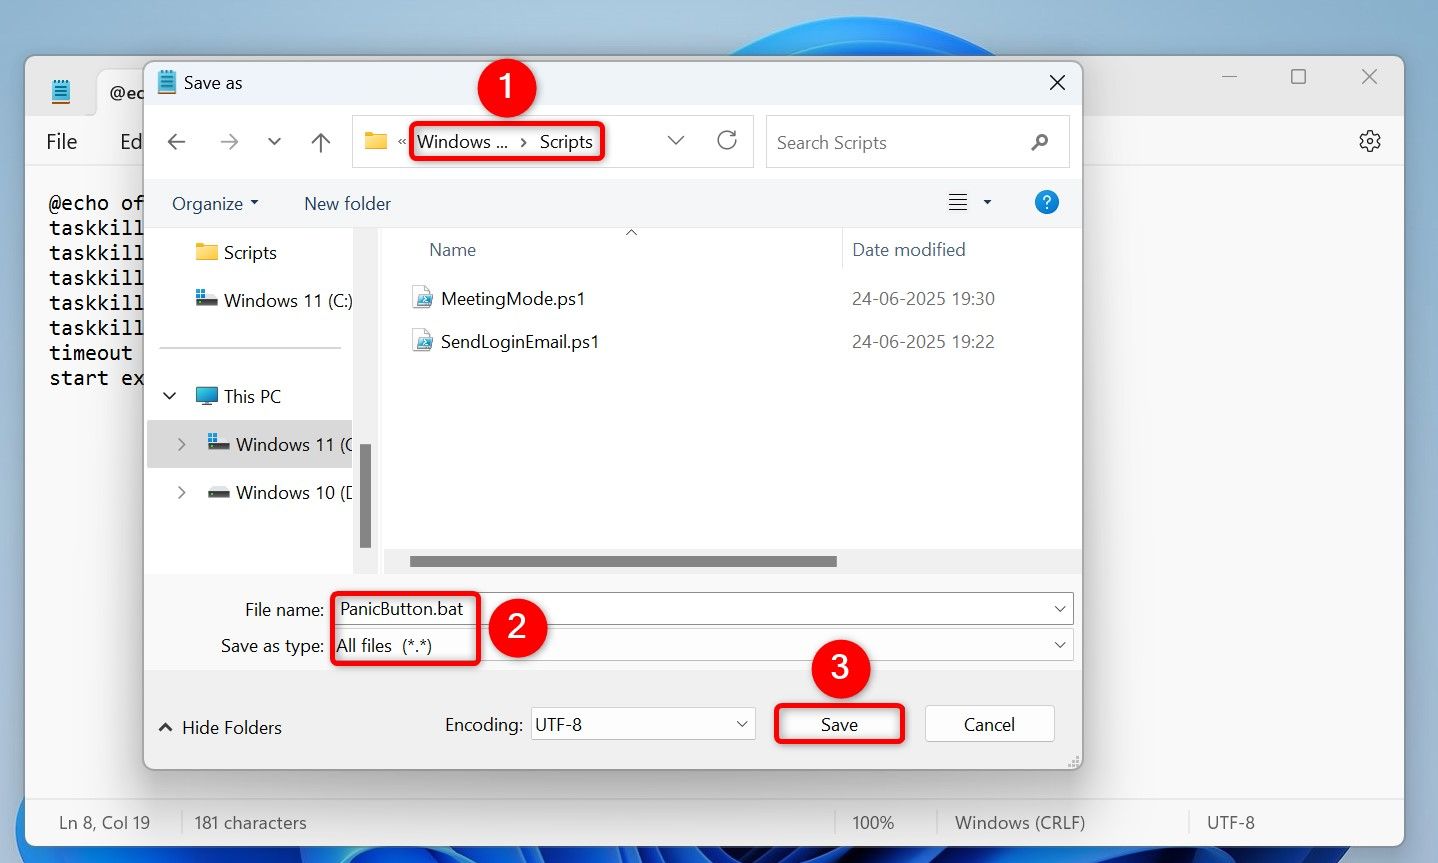
After modifying the script, from Notepad’s menu bar, select File > Save As. Select the folder in which you want to save the file. Click the “Save as Type” drop-down menu and choose “All Files.” Select the “File Name” field and type something like PanicButton.bat. Then, click “Save.”
The next time you want to close all your chosen running apps, double-click your batch file. To add your batch file’s shortcut to your desktop (if you haven’t saved the file on your desktop), right-click the file and choose Show More Options > Send To > Desktop (Create Shortcut). To assign it a keyboard shortcut, right-click the shortcut and choose “Properties.” Access the “Shortcut” tab, click “Shortcut Key,” and press the desired key combo. Then, make sure to click “Apply” followed by “OK.”
Using PowerShell
PowerShell is another way on Windows 11 to close all your chosen running apps. To use this method, open Windows Search (press Windows+S), type Notepad, and open the app. In a new document, type the following:
Stop-Process -Name "chrome" -Force
Stop-Process -Name "firefox" -Force
Stop-Process -Name "notepad" -Force
Stop-Process -Name "wordpad" -Force
Stop-Process -Name "teams" -Force
In the script, replace the app names with the apps you’d like to close. Make sure to use your apps’ process names and not actual names. You can find an app’s process name in the Details tab of Task Manager.
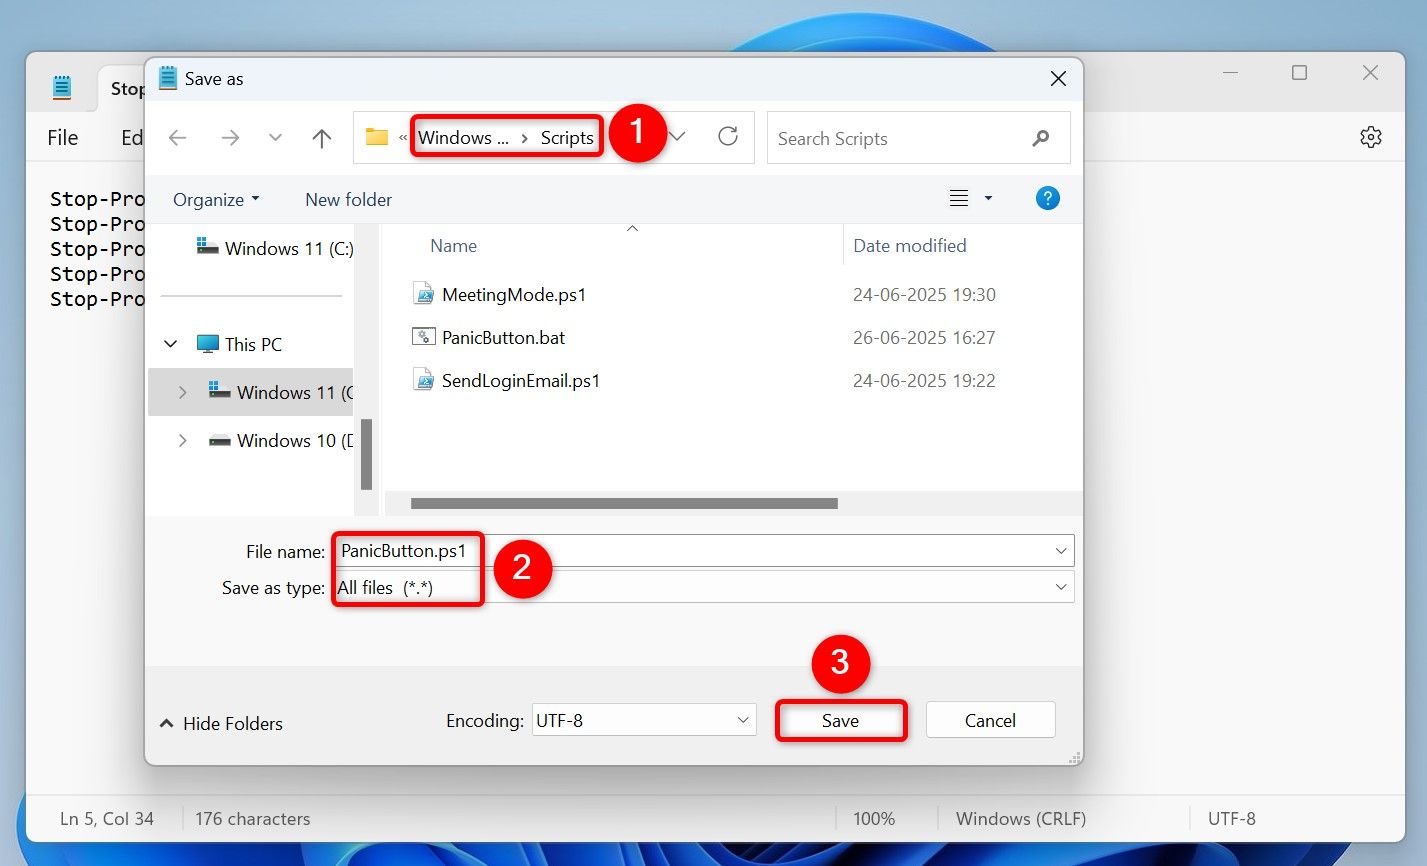
After creating the script, from Notepad’s menu bar, select File > Save As. Select the folder where you want to save the file. Click the “Save as Type” drop-down menu and choose “All Files.” Click the “File Name” field and type something like PanicButton.ps1. Then, click “Save.”
When you want to close all your chosen open apps, right-click your file and choose “Run With PowerShell.”

Related
Geek School: Learn How to Automate Windows with PowerShell
In this edition of Geek School, we will be helping you understand the powerful PowerShell scripting language that is built right into Windows, and is extremely useful to know in an IT environment.
To create the file’s shortcut on your desktop, right-click the file and choose Show More Options > Send To > Desktop (Create Shortcut). To assign it a keyboard shortcut, right-click the shortcut and choose “Properties.” Open the “Shortcut” tab, click the “Shortcut Key” field, and press the shortcut you want to use. Then, click “Apply” followed by “OK.”
Using Task Scheduler
If you want to close your chosen open apps automatically at a specific time or when you lock your machine, integrate your batch file or PowerShell script with Task Scheduler.
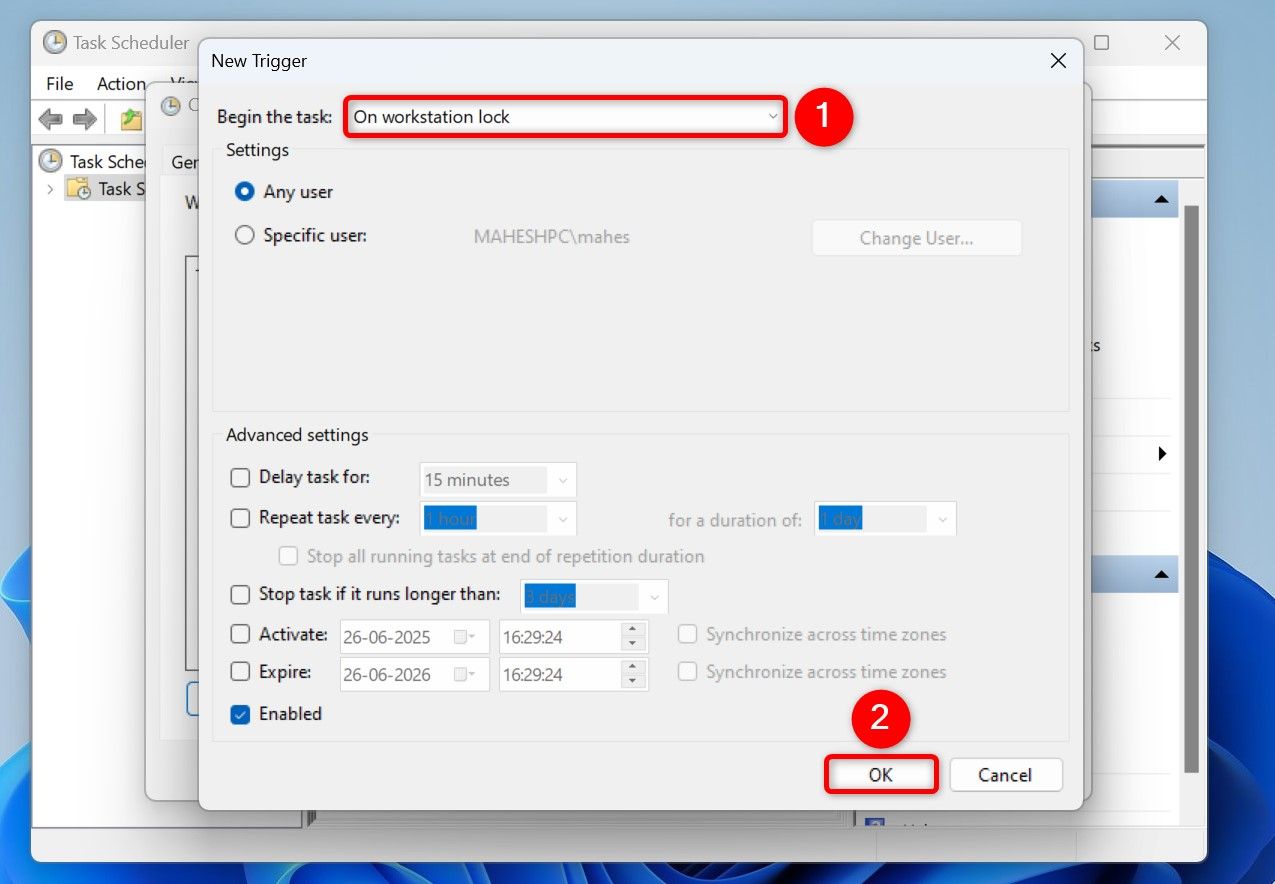
To start, open Windows Search (press Windows+S), type Task Scheduler, and launch the utility. On the right pane, click “Create Task.” Select the “Name” field and type a name for your task. Access the “Triggers” tab, click “New,” and choose when you want to close your apps.
For example, to close your apps when you lock your PC, click the “Begin the Task” drop-down menu and choose “On Workstation Lock.” To close the apps at a specific time, click the “Begin the Task” drop-down menu, choose “On a Schedule,” and define the time.
In either case, save your changes by clicking “OK.”
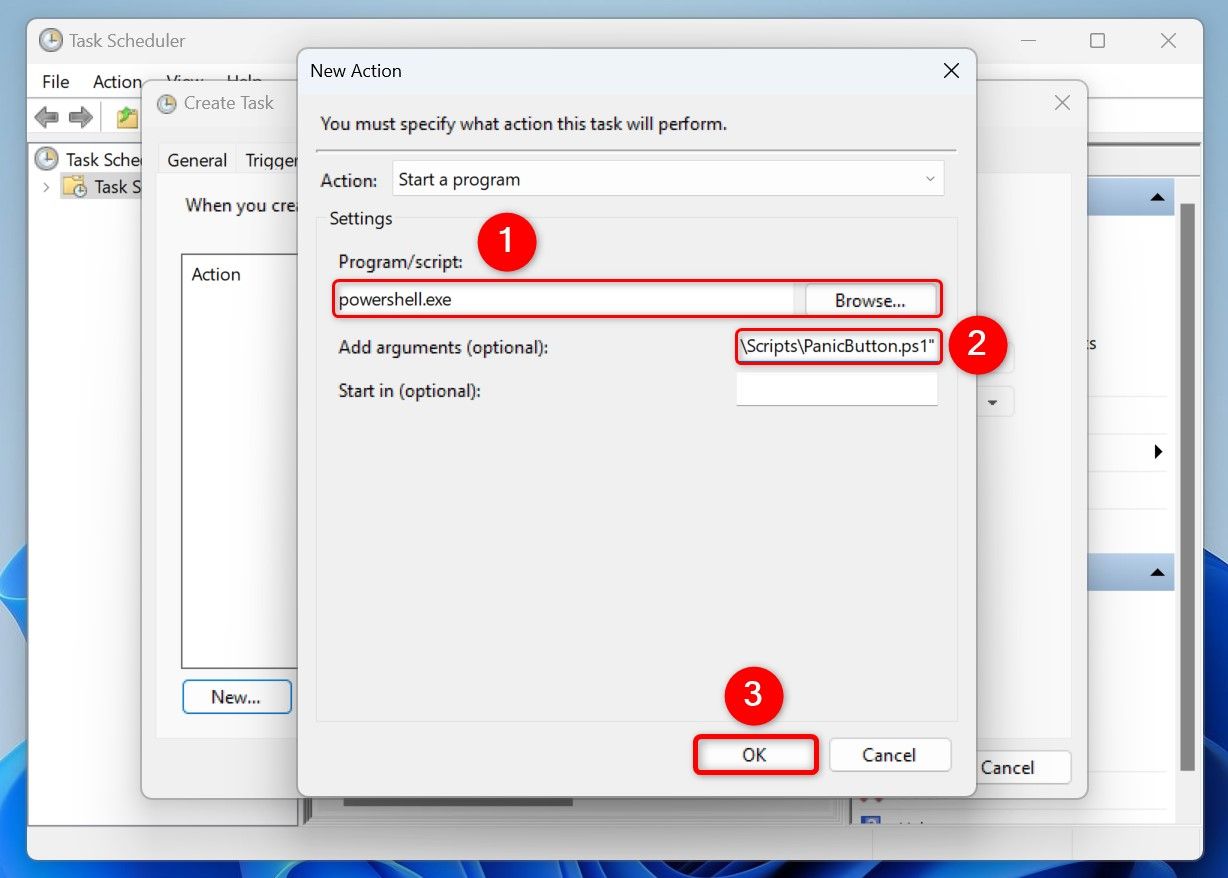
Open the “Actions” tab and click “New.”
If you want to use your batch file, click “Browse” and select your file. If you want to use your PowerShell script, click the “Program/Script” field and type powershell.exe. Click the “Add Arguments (Optional)” field and type the following (replace the script path with the actual path).
-ExecutionPolicy Bypass -File "C:\Scripts\PanicButton.ps1"
Click “OK” and choose “OK” again to save your task.
And that’s how you can close your chosen running apps with a single click or key press on Windows 11. While you’re at it, consider learning some Power Automate flows to automate tasks on your computer.

